...
Image Storages
The Image Storage objects are represent a logical storage units space for Guests' images. It represents a storage space , accessible by a set of Hosts. This space is further divided into Volumes, which store the virtual disks of the Guests. The typical use of an Image Storage is to map a shared disk array and its volumes to the set of Hosts connected to it. flexVDI supports the most common SAN technologies: SAS disk arrays, Fiber Channel, iSCSI...
For now, we will focus on making a local directory available to store Guests' images. If you want to learn how to access a shared storage, refer to the Storage chapter in the Administration Guide.
Volumes
There can be three types of Volumes in an Image Storage can be internal or external. Internal : OCFS2 Volumes, Gluster Volumes and External Volumes. OCFS2 volumes refer to volumes created and offered by the shared storage cabinet, that are accessed by the hosts as a local block device. flexVDI uses the OCFS2 cluster file system to manage internal these volumes, and its configuration and management is discussed in the Administration Guide. OCFS2 supports reflinks and fallocate, which are particularly useful to work with large image files.
On the other hand, external Gluster Volumes use the GlusterFS distributed storage technology to aggregate several local disks into a single storage space. This solution does not need to access a shared volume in a SAN and uses cheaper, more common hardware, but its performance is lower. Gluster also supports fallocate. However, you need at least two hosts to create a Gluster Volume.
| Warning |
|---|
Gluster Volumes are an experimental feature. Stability and performance issues have been observed, so use it at your own risk. |
Finally, External volumes are not directly managed by flexVDI. The system administrator is responsible for mounting them in the same path in all the Hosts involved in the Image Storage. The two most common use cases for external volumes are:
- Use local storage in a single Host.
- Use an NFS or CIFS shared folder accessible by a set of Hosts (Beware: neither NFS nor CIFS support fallocate, so creating new images is a slow process).
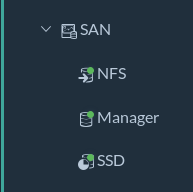
In the tree view, external volumes Volumes are identified by a small white arrow in its icon:stack of disks. Gluster Volumes have an extra pie graph symbol, and External Volumes have an extra right arrow. In this example, "Manager" is an OCFS2 Volume, "SSD" is a Gluster Volume and "NFS" is an External Volume:
Before creating a Guest, you need a volume to store its image. With a single node, the easiest way is to create an external volume that maps to a local directory in your Host. Right-click on Select the "Image Storages" item of the tree view and select click on the "New Image Storage" commandbutton. A new wizard New Image Storage form will appear. Just follow the instructions to create an Image Storage named MyImageStorage on your one Host.

You should now see the MyImageStorage details. Inside it, we are going to create an External Volume named MyExternalVolume that points to that stores its contents in /home/images.

| Note | ||
|---|---|---|
| ||
Be careful that the |
Click on the External Volume, and you will see something like this in the details view:
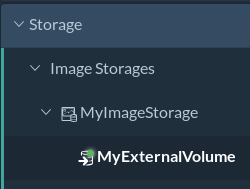
The details view of this new External Volume should show something like this:

Besides the name and the mount point, you can now see the status of the Volume and the available space. In the two tables at the bottom, you will see the Guests' images as you create them.
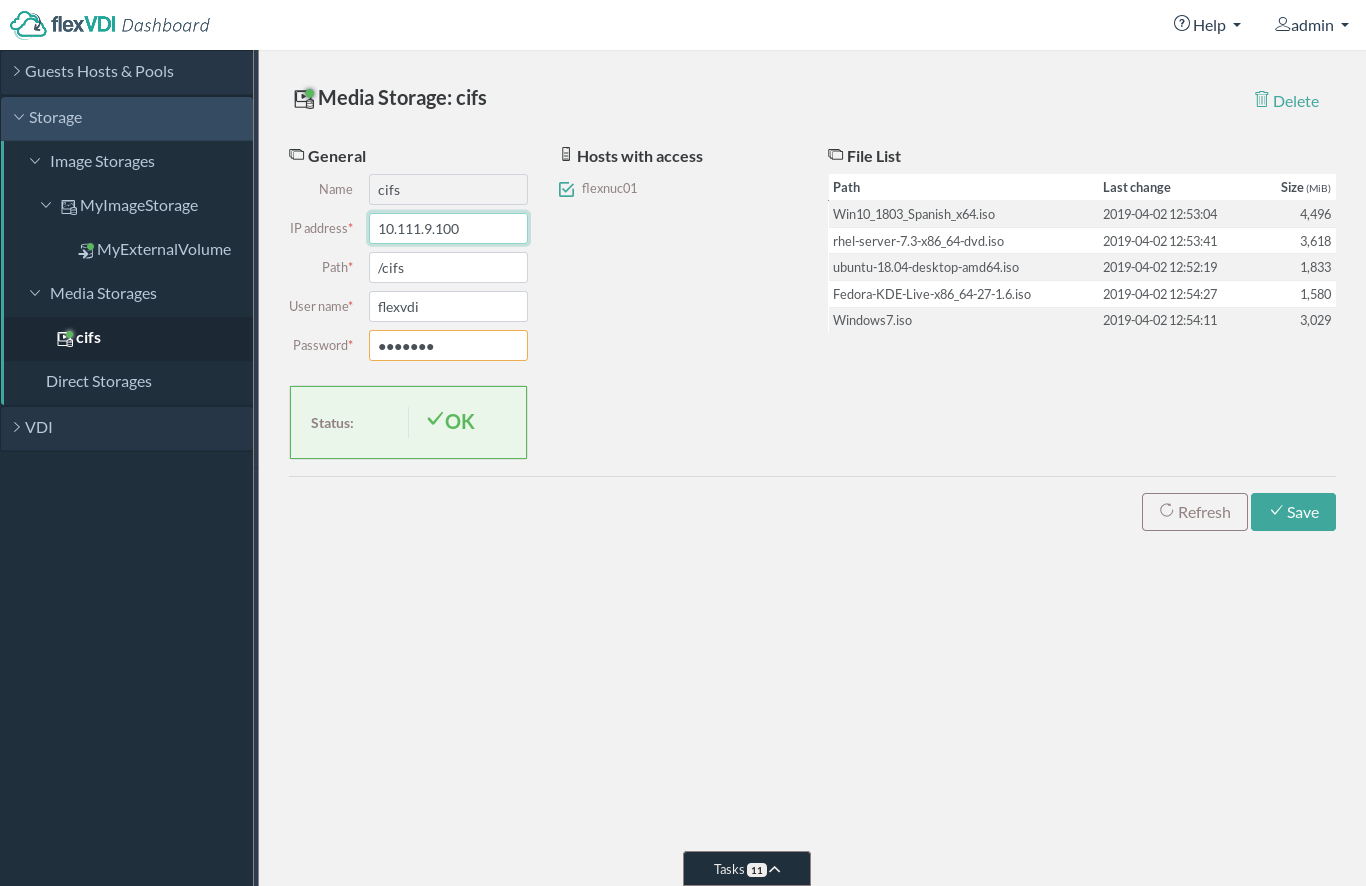
Media Storages
Media Storages are repositories of ISO image files. These files can be mounted as disks by Guests and are useful for the initial installation of the OS. installation media. Two types of files are available from a Media Storage:
At the end of the Getting Started guide , you activated the local CIFS server, so you should already have a Media Storage called cifs. Copy some installation ISOs there in order to install a new Guest later. Click on it, and information about it will be displayed in the details view: