...
But first you must identify the device file for your pendrive. Primero se deberá identificar el fichero de dispositivo que representa al pendrive. Introduzca el pendrive en un puerto disponible. Si el sistema le muestra una notificación de nuevo dispositivo USB insertado, no lo abra; el dispositivo no debe estar montado para poder ser escrito. Abra una ventana de terminal y escriba el siguiente comandoInsert the pendrive in an available USB port. If your system notifies you of the new USB device, do not open it; the pendrive must not be mounted in order to be written. Open a terminal window and write the following command:
| Code Block | ||
|---|---|---|
| ||
# lsblk -p |
Esto le mostrará una lista con los discos conectados a su ordenador, sus particiones y su tamaño. Identifique el fichero del dispositivo que representa al pendrive con esta información. Compruebe además que no aparece nada en el campo "MOUNTPOINT".
Una vez identificado el fichero de dispositivo (supongamos que es /dev/sdb), escriba los siguiente comandosThis command will show a list with the drives connected to the computer, their partitions and their size. Identify the device file that represents your pendrive with this information. Make sure that the field "MOUNTPOINT" has no value.
Once the device file has been identified (we will assume it is /dev/sdb from now on), write the following commands:
| Code Block | ||
|---|---|---|
| ||
# zcat flexvdi-live-2.2.12-usb.img.gz | dd of=/dev/sdb bs=1M # sync |
Cuando termine, dispondrá de un pendrive con el que arrancar When it finishes, you will have a bootable pendrive with flexVDI Live USB Client v2.2.12.
Windows
En Windows, la herramienta más utilizada para escribir imágenes en pendrives USB es Rufus. Asegúrese de seleccionar primero la opción "Crear disco de arranque con: Imagen DD". Luego, simplemente busque el fichero de imagen que ha descargado y el pendrive USB, y pulse "Empezar". No hay problema con que la imagen esté comprimida con GZip, Rufus la descomprimirá al vuelo según la escribe.
Arranque
Inserte el pendrive en el equipo en el que va a ejecutar el cliente de flexVDI, y luego enciéndalo. Si su equipo no está configurado para arrancar desde USB, deberá cambiar la configuración, o seleccionar el USB en el menú de arranque. Este proceso depende del firmware que tenga instalado en su equipo. flexVDI Live USB Client funciona tanto con firmware BIOS como UEFI.
Verá un menú de arranque con el logotipo de flexVDI. El menú contiene dos entradas, una para arranque normal y otra para arranque sin aplicar la configuración personalizada. Esta segunda opción solo es necesaria en casos excepcionales. Si no selecciona nada, el sistema arrancará en el modo normal tras 5 segundos.
Tras un breve proceso de arranque, verá la ventana del cliente:
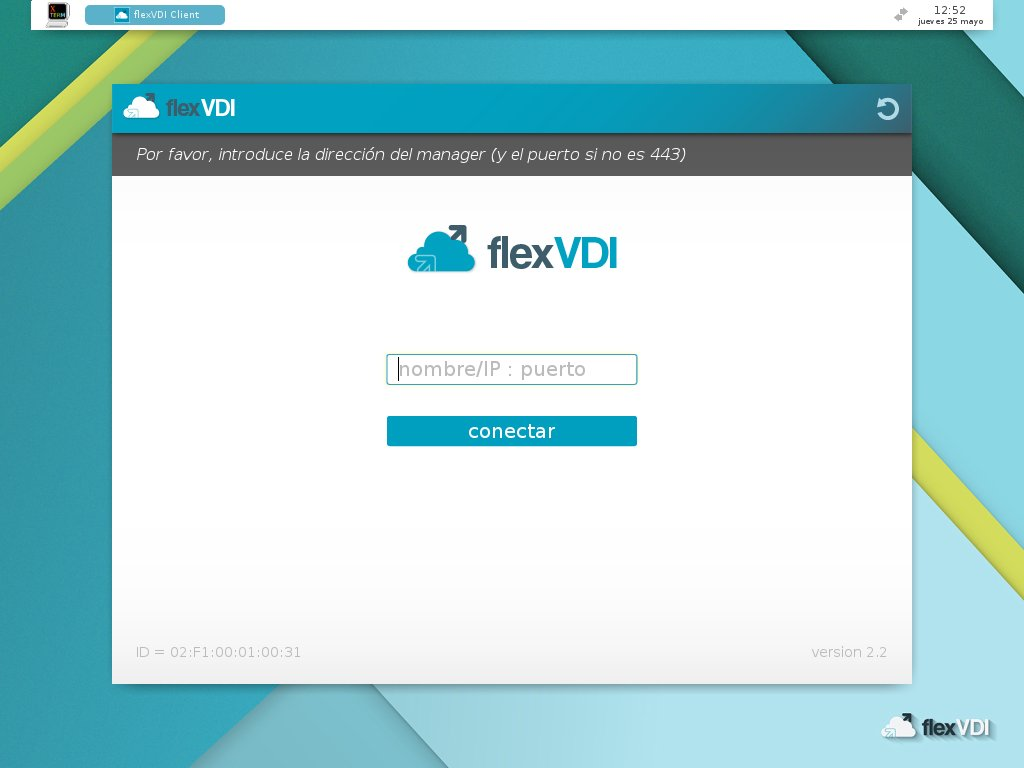
Figura 1: Interfaz del cliente tras el primer arranque.
El aspecto y funcionamiento del cliente es similar al del cliente para GNU/Linux, así que no se va a detallar aquí.
En el borde superior aparece un panel con información y acciones adicionales. De izquierda a derecha:
- Un botón para abrir una ventana de terminal.
- La lista de ventanas abiertas.
- El applet de la conexión de red. Permite ver el estado actual y conectar a redes cableadas y WiFi.
- En caso de ser un equipo portátil, aparece también el estado de la batería.
- El reloj con la hora y la fecha.
Instalación
Para instalar la distribución en el equipo de forma que no sea necesario arrancar desde USB, utilice el programa de instalación. Para ello, debe iniciar sesión como usuario root de una de estas dos formas:
- Abrir una ventana de terminal y ejecutar el comando '
su -'. La contraseña por defecto es 'flexvdi'. - Cambiar a la terminal de texto con la combinación de teclas Ctrl+Alt+F1 e iniciar sesión como root.
Una vez hecho, ejecute el programa de instalación /root/install.sh. Este programa espera como argumento el fichero de dispositivo en el que se va a instalar. Si se omite, tratará de realizar la instalación en /dev/mmcblk0 (si existe) o en /dev/sda. Una vez confirmado el dispositivo de destino, comenzará el proceso de instalación.
En función de si el arranque desde USB se hizo con BIOS o con UEFI, el programa de instalación prepara el arranque desde el disco duro para que se haga de la misma manera. Se han visto equipos con UEFI que no arrancan correctamente una vez terminado el proceso de instalación. Si observa este problema y su equipo puede arrancar también con BIOS (normalmente llamado modo Legacy en la configuración UEFI), vuelva a arrancar con USB utilizando este método y ejecute de nuevo la instalación.
Si trata de instalar el cliente sobre un disco que contiene una instalación anterior, el programa de instalación le preguntará si quiere mantener la configuración personalizada.
Tras una instalación con éxito, retire el pendrive USB y reinicie el equipo.
Personalización
Al estar basado en Porteus v3.2.2, el proceso de personalización de flexVDI Live USB Client sigue sus mismas directivas. El sistema de ficheros raíz se monta en memoria y se carga con una serie de módulos base. Los cambios que se hagan después al sistema de ficheros no se guardan a disco, y se pierden una vez apagado el equipo. Para tener cambios persistentes, hay que escribirlos en un directorio especial de la partición de datos.
La distribución está dividida en dos particiones. La primera contiene ficheros de arranque, la segunda contiene los módulos base y los ficheros de personalización, dentro de un directorio llamado porteus. Durante el proceso de arranque, después de cargar el contenido de los módulos en el sistema de ficheros raíz, se cargan los ficheros del subdirectorio rootcopy. Cualquier cambio que se quiera aplicar en cada reinicio se debe copiar a ese subdirectorio. Cualquier fichero que haya en ese subdirectorio se copiará al sistema de ficheros raíz, en su ubicación correspondiente, y manteniendo propietario y permisos, por lo tanto la capacidad de personalización es total.
A continuación se dan una serie de ejemplos prácticos de personalización, asumiendo que la partición de datos es /dev/sda2 (ésta y las demás particiones se montan automáticamente en /mnt al arrancar).
Personalizar la dirección de conexión
La dirección de la plataforma de flexVDI a la que se debe conectar el cliente se guarda en el fichero de configuración .flexvdi/flexvdi-client.conf, en el directorio home del usuario guest. Por defecto, no hay configurada ninguna dirección, y el cliente la solicita cada vez, como se muestra en la figura In Windows, the most famous tool to write images in USB pendrives is Rufus. Just make sure you check the "Create a bootable disk usgin: DD Image". Then, simply select the image file you downloaded and the USB pendrive, and press "Start". There is no problem in using a GZip-compressed image, Rufus will uncompress it on the fly.
Booting
Insert the pendrive in the computer where you want to run flexVDI Client, and turn it on. If your computer is not configured to boot from USB, you must change the configuration, or select the USB pendrive from the boot menu. This process depends on the firmware that is installed in your computer. flexVDI Live USB Client works with both BIOS and UEFI firmwares.
A boot menu with the flexVDI logo will appear. It contains two entries, for normal boot and fresh boot (no custom configuration). The fresh boot is only needed in exceptional situations. If nothing is selected, the system will boot in normal mode after 5 seconds.
After a short boot process, the client window will show:
Figura 1: Client interface after the first boot-up.
The look and functionalities of the client is similar to the flexVDI Client for GNU/Linux, so it won't be detailed here again.
At the top border, there is a panel with information and additional actions. From left to right:
- A button to open a terminal window.
- The list of open windows.
- The network connection applet. It shows the current status and allows to connect to wired and WiFi networks.
- If present, the battery status.
- A clock with the date and time.
Installation
To install the client in the computer so that the USB pendrive is not needed anymore, use the installation program. To launch it, you must log in as root by either:
- Opening a terminal window an running '
su -'; the default password is 'flexvdi'. - Or change to a text terminal with Ctrl+Alt+F1 and log in as root.
Then, run the installation program /root/install.sh. It expects the destination device file as argument. By default, it will try to install in /dev/mmcblk0 (if it exists) or in /dev/sda. Once the destination device is confirmed, the installation process will start.
Depending on whether the boot process from USB was done with BIOS or UEFI, the installation program sets the boot process from hard disk so that it is done in the same way. Beware that we have observed some UEFI systems that will not boot correctly once the installation process is finished. If you encounter this problem and your system is able to boot from BIOS too (usually referred to as "Legacy mode" in the UEFI configuration), try to repeat the installation process after booting from USB in this mode.
If you try to install the client on a disk that contains a previous versiont, the installation program will ask you if you want to keep the old custom configuration.
After a successful installation, remove the USB pendrive and restart your computer.
Customization
Since it is based on Porteus v3.2.2, the customization process of the flexVDI Live USB Client is similar. The root filesystem is mounted in memory and a set of base modules are loaded. Changes done to the filesystem afterwards are not saved to disk, and they are lost once the system is shut down. To persist these changes, they have to be written to a special directory in the data partition.
The distribution is divided in two partitions. The first one contains the boot files, the second one contains the base modules and the customization files, inside a directory named porteus. During the boot process, after loading the content of the base modules in the root filesystem, the files from the rootcopy subdirectory are copied. Any change that has to be applied on every reboot must be copied to this subdirectory. Any file in this directory is copied to the root filesystem, keeping its full path, owner and permissions, so the customization possibilities are endless.
Here we show some common customization examples, assuming that the data partition is /dev/sda2 (this and any other found partition are automatically mounted at /mnt on boot).
Customize the connection address
The flexVDI platform address where the client must connect to is stored in the configuration file .flexvdi/flexvdi-client.conf, in the guest user's home directory. By default, there is no configured address, and the client will ask for it every time, as shown in Figure 1:
| Code Block | ||||
|---|---|---|---|---|
| ||||
# flexVDI GNU/Linux client configuration # Default value of each option is commented # Configure this with the IP of your manager # manager_ip = ... |
Por lo tanto, para establecer una dirección personalizada, se debe guardar en el fichero So, in order to set a custom address, it must be stored in the file /mnt/sda2/porteus/rootcopy/home/guest/.flexvdi/flexvdi-client.conf:
| Code Block | ||||
|---|---|---|---|---|
| ||||
# flexVDI GNU/Linux client configuration # Default value of each option is commented # Configure this with the IP of your manager manager_ip = flexvdi.mycompany.com ... |
Selección de los dispositivos de sonido por defecto
...
Select the sound devices by default
When there are many sound devices connected to the computer (sound cards with several inputs or outputs, HDMI ports, USB microphones, etc...), se debe definir cuales se van a compartir con el escritorio remoto. En este caso, se dispone de un programa llamado setup-audio.sh que permite configurarlos y automáticamente guarda los cambios en el directorio rootcopy para que persistan al siguiente reinicio. Este programa debe ejecutarse como root. Un ejemplo de ejecución sería el siguienteyou must set which ones will be shared with the remote desktop. In this case, there is a program named setup-audio.sh that allows to configure them and automatically saves the changes in the rootcopy directory so that they persist the next reboot. This program must be run as root. An example of execution would be the following:
| Code Block | ||
|---|---|---|
| ||
# setup-audio.sh Available audio inputs: ----------------------- 1 Built-in Audio Analog Stereo 2 Yeti Stereo Microphone Analog Stereo Select default input device [1-2]: 2 Available audio outputs: ------------------------ 1 Built-in Audio Analog Stereo 2 Built-in Audio Digital Stereo (HDMI) 3 Yeti Stereo Microphone Analog Stereo Select default output device [1-3]: 2 # |
Configuración de red
...
Configure the network
The network configuration is performed with the panel applet, next to the clock. Press the icon with the left mouse button and a menu with the available connections will show. Press it with the right mouse button and you will be able to modify them or add new ones. In any case, the configuration is stored in the directory /etc/NetworkManager/system-connections. Por tanto, para hacer esta configuración persistente, solo tiene que copiar los ficheros de ese directorio a /devSo, to persist this configuration, you just have to copy the files in that directory to /mnt/sda2/porteus/rootcopy/etc/NetworkManager/system-connections.