VDI: flexVDI with user authentication
Now let's create a new VDI configuration in which users have their own list of desktop policies, instead of associating it to the terminal.
Previous requirements
In order to perform this configuration, it is necessary to have in place a directory service: an LDAP server, Microsoft Active Directory or similar product. Installation and configuration of the server is beyond the scope of this guide. Check with your directory service administrator the right values to use to authenticate users in your directory service.
Creating Terminal Policy
On the home screen of flexVDI Dashboard, open the VDI section in the upper left area.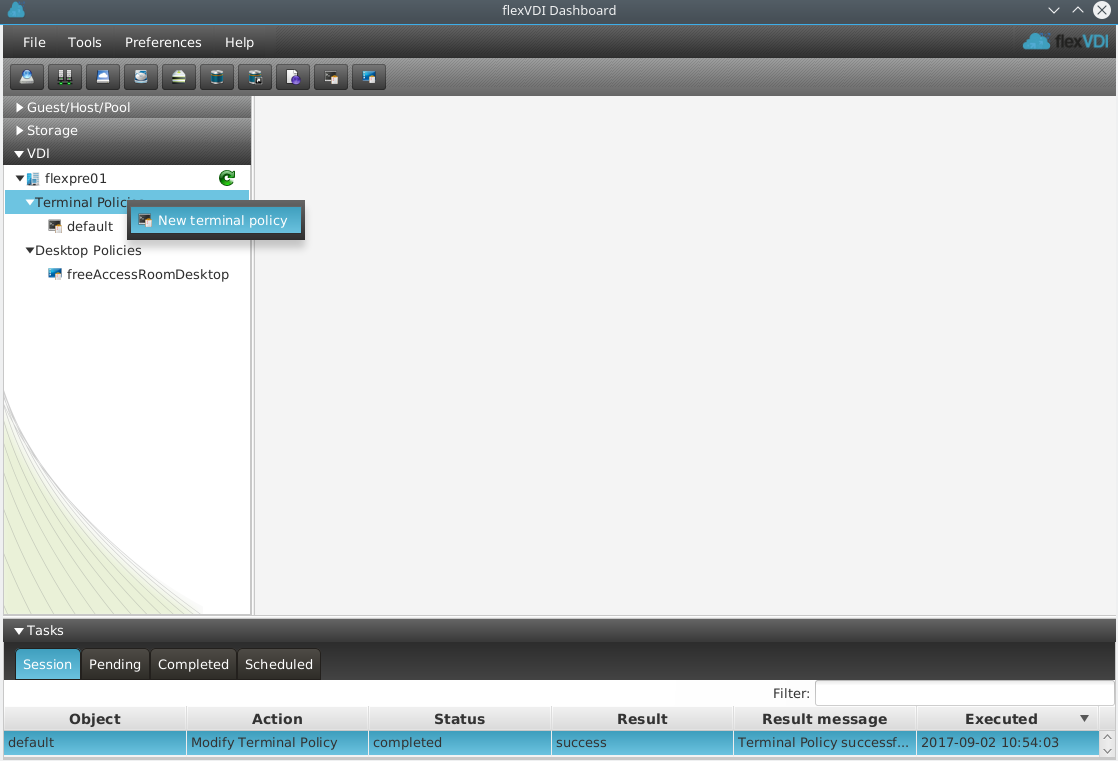
Open the context menu of "Terminal Policy" and click on "New terminal policy". You will be presented a window like this: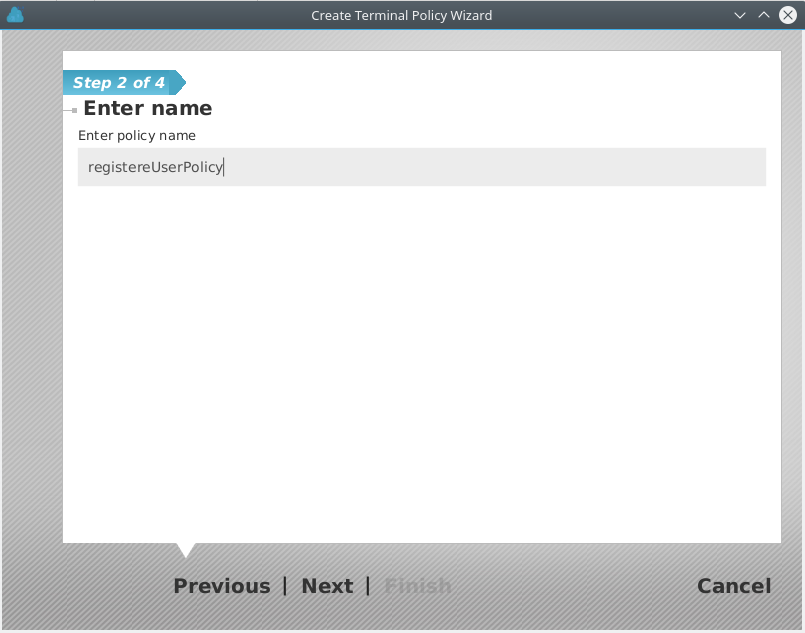
Enter the name of the new policy. In our example it is called "registeredUserPolicy". Click "Next".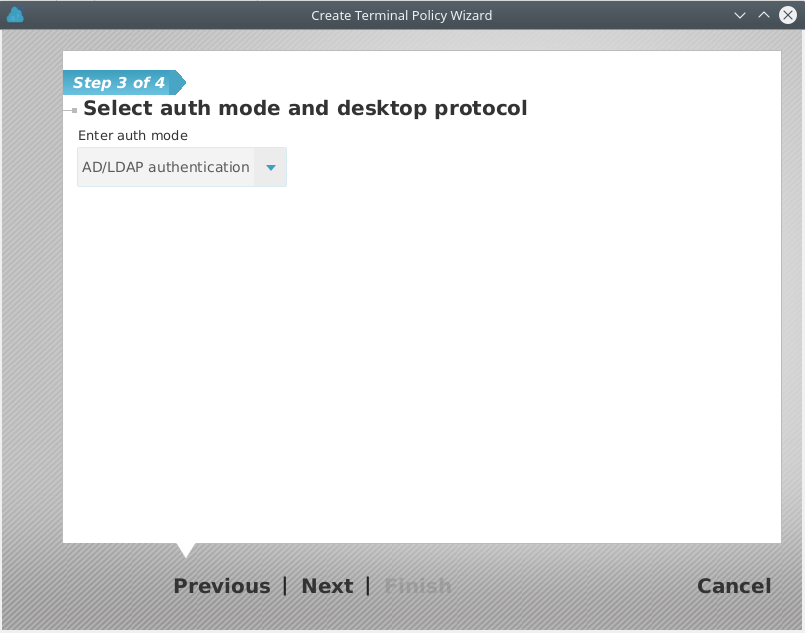
In the authentication mode drop-down, select "AD/LDAP Authentication". Click Next.
In this screen are configured all the settings to access the directory service. The input fields are:
- IP Server: IP address of the machine that serves the LDAP / Active Directory / ...
- Server port: 389 is the default value.
- Proxy User User name to be used to query the LDAP, called "bind DN" in some environments. You must enter the full DN (domain name).
If the Authentication server is an Active Directory, the "Proxy user" may also be composed like "NetBIOS Domain Name"\"User Name" or "User Name"@"Domain FQDN". E.g. "MYCOMPANY\Administrator" or "Administrator@flexvdi.com".
- Proxy Password: password to authenticate the "proxy user".
- Realm: LDAP branch under which the information on the users of this flexVDI infrastructure is stored. In a common configuration of Active Directory, you must enter the Common Name "Users", followed by the components of the specific domain name as DC, separated by commas; for example "cn=Users,dc=companyname,DC=com"
- RDN entry: RDN component used in the search associated with the user name entered in the flexVDI Client. Usually "sAMAccountName" in windows environments, but also "uid", "userPrincipalName", "mail", o "cn" which result in searches of the form "sAMAccountName=JohnDoe", "userPrincipalName=johndoe@flexvdi.com". Make sure the "entry rdn" field contains the name of the attribute that identifies your users in that realm. If in doubt, contact your AD/LDAP administrator.
- Desktop policy Attr: attribute in the user entry containing a coma-separated list of "Desktop policies" that are available for this user. To simplify user management, flexVDI recommends using an attribute that already exists in your directory schema but is not used. For instance, in an Active Directory, the "info" attribute is hardly ever used and is easily visible and editable with the "AD Users and Computers" tool (it is labeled "Notes").
- Default desktop Policy: Desktop Policy assigned to users who do not have their Desktop specified in their Directory Service entry. It also uses the comma separated list of values format.
Now click "Finish".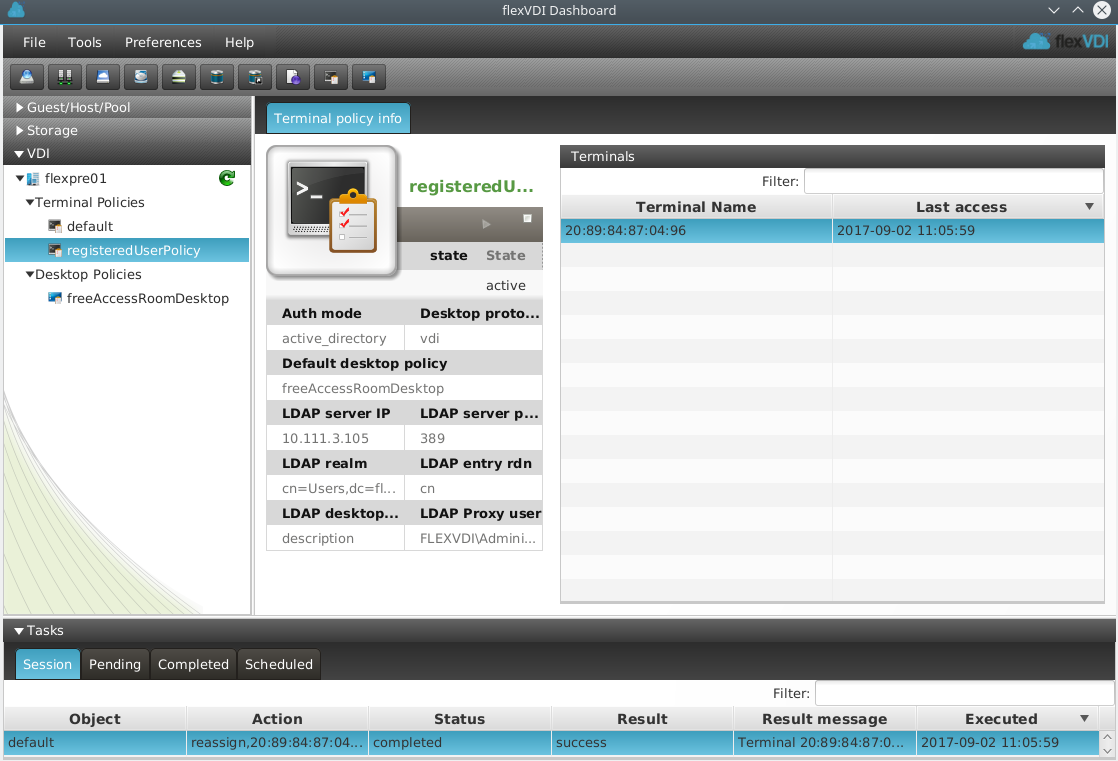
You have now set up your "Terminal Policy" with user authentication. Now you must assign to it the terminals from which authenticated users will connect, as shown in VDI: flexVDI in kiosk mode under the "Assigning a terminal to a terminal policy" header.
Accessing the desktop with flexVDI Client
Now you will use the VDI environment you just created. To do this you will use the flexVDI Client that was installed and configured in the previous page VDI: flexVDI in kiosk mode.
Having assigned an authenticated Desktop Policy to the terminal, flexVDI Client will show a screen like this: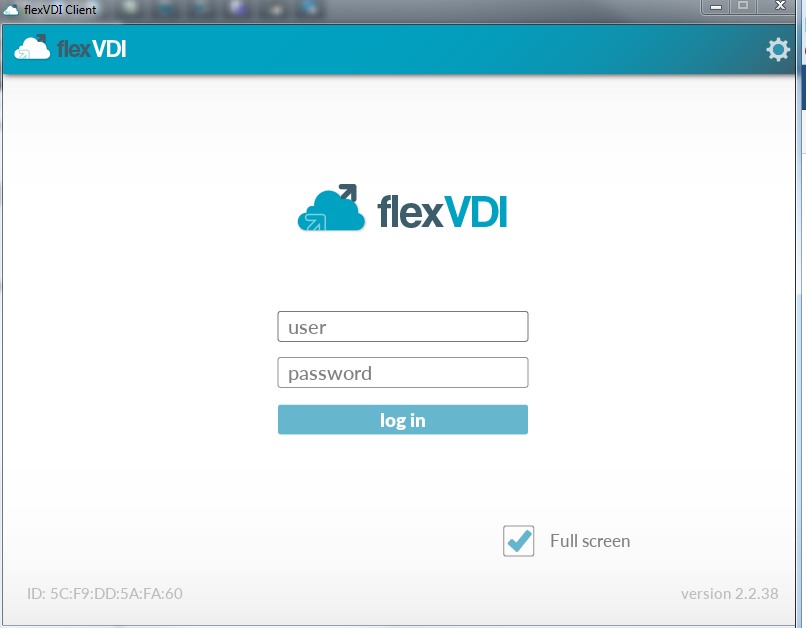
Enter your credentials, and click on connect. If you have been assigned only one Desktop Policy, as in the example we have followed so far, flexVDI will directly connect you to your desktop. If you had created several Desktop Policies of Guests and would have associated them to the user, he would be shown a desktop selection screen to choose the desktop to use now.
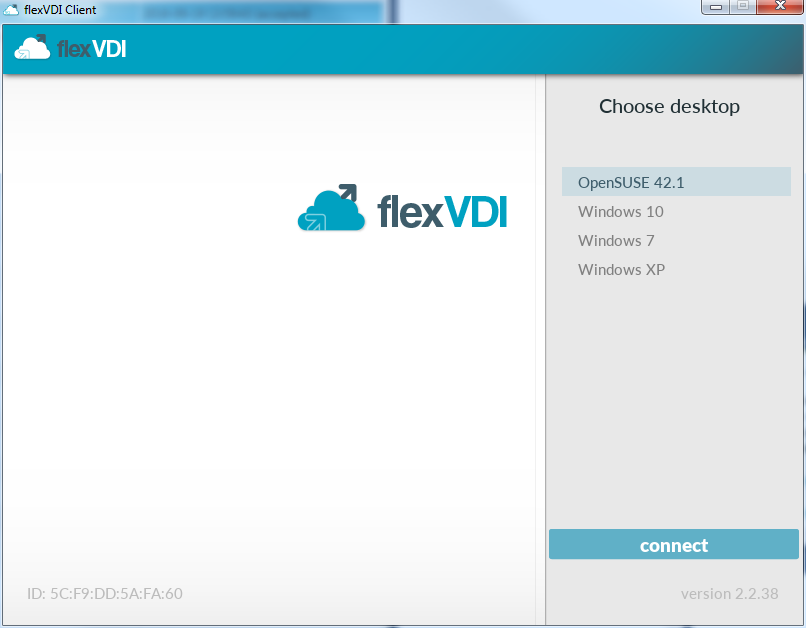
And after pressing "enter":
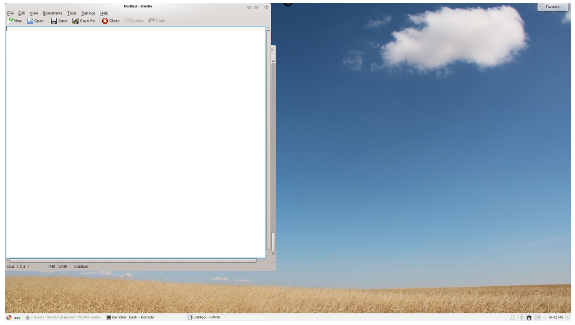
It will connect to the console of the selected desktop.