flexVDI Live USB Client 2.2
Current version: 2.2.13
The flexVDI Live USB Client is a Linux distribution that boots from a USB pendrive, without the need for another operating system. Its purpose is to turn old computers and Thin Clients into flexVDI virtual desktop terminals, since it supports a wide range of harware with 32 and 64-bit Intel achitectures. Its main features are:
- Distribution based on Porteus 3.2.2, with Linux kernel 4.9.
- It works with BIOS and UEFI.
- Installable on hard disks and MMC devices.
- Up-to-date graphics drivers, for Intel, AMD and Nvidia cards.
- Possibility of booting other computers in the same network with PXE.
- Customizable design and configuration.
- It fits into just 1GB.
Preparation
The flexVDI Live USB Client image that is available in the download section of the flexVDI web is ready to be written to a pendrive. Once downloaded, the write process will depend on the operating system you are working on. We show here two possibilities.
GNU/Linux
On this OS, the preferred and simplest method to write an image to a USB pendrive involves using the dd command. You must be root to run this command on a device file. There are GUI tools too, that simplify this process, like Gnome Multi-Writer, Etcher and Unetbootin.
But first you must identify the device file for your pendrive. Insert the pendrive in an available USB port. If your system notifies you of the new USB device, do not open it; the pendrive must not be mounted in order to be written. Open a terminal window and write the following command:
# lsblk -p
This command will show a list with the drives connected to the computer, their partitions and their size. Identify the device file that represents your pendrive with this information. Make sure that the field "MOUNTPOINT" has no value.
Once the device file has been identified (we will assume it is /dev/sdb from now on), write the following commands:
# zcat flexvdi-live-2.2.13-usb.img.gz | dd of=/dev/sdb bs=1M
# sync
When it finishes, you will have a bootable pendrive with flexVDI Live USB Client v2.2.13.
Windows
In Windows, the most famous tool to write images in USB pendrives is Rufus. Just make sure you check the "Create a bootable disk using: DD Image". Then, simply select the image file you downloaded and the USB pendrive, and press "Start". There is no problem in using a GZip-compressed image, Rufus will uncompress it on the fly.
Booting
Insert the pendrive in the computer where you want to run flexVDI Client, and turn it on. If your computer is not configured to boot from USB, you must change the configuration, or select the USB pendrive from the boot menu. This process depends on the firmware that is installed in your computer. flexVDI Live USB Client works with both BIOS and UEFI firmwares.
A boot menu with the flexVDI logo will appear. It contains two entries, for normal boot and fresh boot (no custom configuration). The fresh boot is only needed in exceptional situations. If nothing is selected, the system will boot in normal mode after 5 seconds.
After a short boot process, the client window will show:
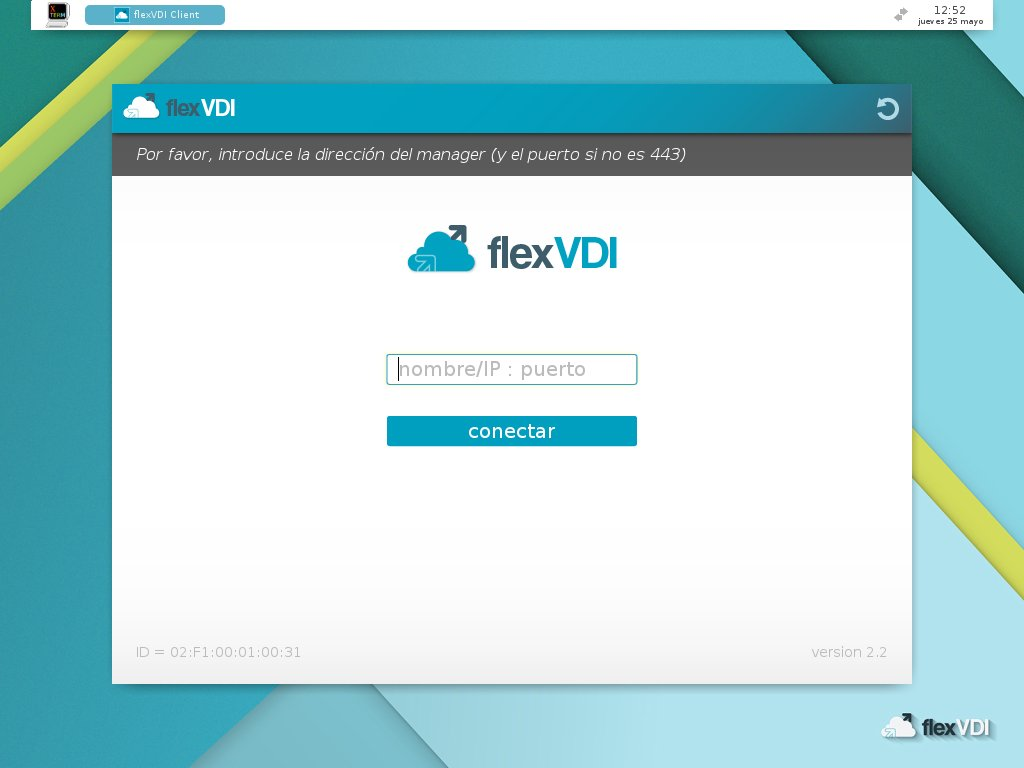
Figura 1: Client interface after the first boot-up.
The look and functionalities of the client is similar to the flexVDI Client for GNU/Linux, so it won't be detailed here again.
At the top border, there is a panel with information and additional actions. From left to right:
- A button to open a terminal window.
- The list of open windows.
- The network connection applet. It shows the current status and allows to connect to wired and WiFi networks.
- If present, the battery status.
- A clock with the date and time.
Installation
To install the client in the computer so that the USB pendrive is not needed anymore, use the installation program. To launch it, you must log in as root by either:
- Opening a terminal window an running '
su -'; the default password is 'flexvdi'. - Or change to a text terminal with Ctrl+Alt+F1 and log in as root.
Then, run the installation program /root/install.sh. It expects the destination device file as argument. By default, it will try to install in /dev/mmcblk0 (if it exists) or in /dev/sda. Once the destination device is confirmed, the installation process will start.
Depending on whether the boot process from USB was done with BIOS or UEFI, the installation program sets the boot process from hard disk so that it is done in the same way. Beware that we have observed some UEFI systems that will not boot correctly once the installation process is finished. If you encounter this problem and your system is able to boot from BIOS too (usually referred to as "Legacy mode" in the UEFI configuration), try to repeat the installation process after booting from USB in this mode.
If you try to install the client on a disk that contains a previous version, the installation program will ask you if you want to keep the old custom configuration.
After a successful installation, remove the USB pendrive and restart your computer.
Customization
Since it is based on Porteus v3.2.2, the customization process of the flexVDI Live USB Client is similar. The root filesystem is mounted in memory and a set of base modules are loaded. Changes done to the filesystem afterwards are not saved to disk, and they are lost once the system is shut down. To persist these changes, they have to be written to a special directory in the data partition.
The distribution is divided in two partitions. The first one contains the boot files, the second one contains the base modules and the customization files, inside a directory named porteus. During the boot process, after loading the content of the base modules in the root filesystem, the files from the rootcopy subdirectory are copied. Any change that has to be applied on every reboot must be copied to this subdirectory. Any file in this directory is copied to the root filesystem, keeping its full path, owner and permissions, so the customization possibilities are endless. Since v2.2.15: The new command persist will copy any file or directory to the rootcopy directory with the correct ownership and permisions; just run it as persist [file|dir].
Here we show some common customization examples, assuming that the data partition is /dev/sda2 (this and any other found partition are automatically mounted at /mnt on boot).
Customize the connection address
The flexVDI platform address where the client must connect to is stored in the configuration file .flexvdi/flexvdi-client.conf, in the guest user's home directory. Changes to this file take effect as soon as flexvdi-client is started, but they are not persistent. By default, there is no configured address, and the client will ask for it every time, as shown in Figure 1:
# flexVDI GNU/Linux client configuration
# Default value of each option is commented

# Configure this with the IP of your manager
# manager_ip =
...
So, in order to set a custom address, it must be stored in the file /mnt/sda2/porteus/rootcopy/home/guest/.flexvdi/flexvdi-client.conf. Changes to this file are persistent, and will take effect after the machine is rebooted:
# flexVDI GNU/Linux client configuration
# Default value of each option is commented

# Configure this with the IP of your manager
manager_ip = flexvdi.mycompany.com
...
Select the sound devices by default
When there are many sound devices connected to the computer (sound cards with several inputs or outputs, HDMI ports, USB microphones, etc...), you must set which ones will be shared with the remote desktop. In this case, there is a program named setup-audio.sh that allows to configure them and automatically saves the changes in the rootcopy directory so that they persist the next reboot. This program must be run as root. An example of execution would be the following:
# setup-audio.sh

Available audio inputs:
-----------------------

1 Built-in Audio Analog Stereo
2 Yeti Stereo Microphone Analog Stereo

Select default input device [1-2]: 2

Available audio outputs:
------------------------

1 Built-in Audio Analog Stereo
2 Built-in Audio Digital Stereo (HDMI)
3 Yeti Stereo Microphone Analog Stereo

Select default output device [1-3]: 2
#
Configure the network
The network configuration is performed with the panel applet, next to the clock. Press the icon with the left mouse button and a menu with the available connections will show. Press it with the right mouse button and you will be able to modify them or add new ones. In any case, the configuration is stored in the directory /etc/NetworkManager/system-connections. So, to persist this configuration, you just have to copy the files in that directory to /mnt/sda2/porteus/rootcopy/etc/NetworkManager/system-connections.
Configure the language
The system language is set to Spanish by default. You can set your preferred locale, but take into account that the flexVDI client is only translated to Spanish and English; it will show English texts for any locale other than Spanish.
The language is set with the LANG environment variable in the file /etc/profile.d/lang.sh. Just copy it to /mnt/sda2/porteus/rootcopy/etc/profile.d/lang.sh and modify it so that your changes persist after reboot. For instance, to select US English, change the default value of es_ES.utf8 to en_US.utf8.
You can also change the keyboard layout and timezone. These are set with kernel parameters, so you will have to edit the file /mnt/sda1/boot/syslinux.cfg (BIOS boot) or /mnt/sda1/EFI/BOOT/syslinux.cfg (UEFI boot) and modify the following kernel command line parameters:
- kmap=layout. Sets the keyboard layout, to Spanish by default. See the
/etc/X11/xkb/symbolsdirectory for valid keyboard layouts. - timezone=region/zone. Sets the timezone, to Europe/Madrid by default. See the file
/usr/sbin/timeconfigfor valid time zones. - You can also change the boot menu entries to match your language.
You DO NOT have to persist the syslinux.cfg file, it is already persisted.
Select which USB devices to redirect at connect time
In order to have one or more USB devices (e.g. a smartcard reader) always redirected, you have to follow these steps:
- Identify the vendor and product ID (VID & PID) of these devices. You can easily do this if you open the USB device selection dialog, from the menu item at Input → Select USB devices for redirection:
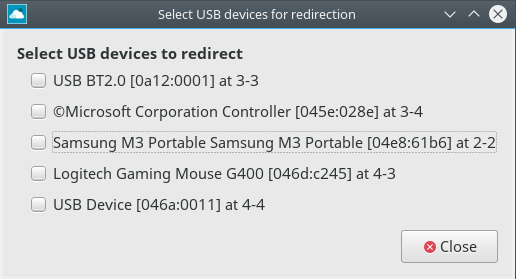
The VID and PID are the two hexadecimal numbers that appear enclosed in square brackets after the name of each device. Modify the file
/mnt/sda2/porteus/rootcopy/home/guest/.flexvdi/flexvdi-client.conf, like with the connection address, and change the parameterspice_extra_argsin the following way:spice_extra_args = --spice-usbredir-redirect-on-connect=-1,VID1,PID1,-1,1|-1,VID2,PID2,-1,1|...
Where VID1, PID1, ... are the VID and PID of each device you want to redirect on connect. Each tuple "-1,VID,PID,-1,1" is separated from the rest with a vertical bar "|". VID and PID numbers must be written in hexadecimal, with a leading "0x" prefix. For instance, to redirect the first device (it is a Bluetooth dongle) on connect, I would write the tuple "-1,0xa12,0x1,-1,1".
Booting many thin clients with PXE
It is very easy to set up a PXE server with flexVDI USB Live Client so that many thin client computers boot to the flexVDI Client with the same configuration. Follow these instructions:
- Boot and install flexVDI USB Live Client on one computer, which will act as the PXE and DHCP server. Then open a terminal to log in as root.
You will have to configure a static IP address for the server. Use the nmcli tool:
# nmcli con show
NAME  UUID                                  TYPE            DEVICE
eth0  e0b3394c-9463-4fa5-a415-cde1e6f1badd  802-3-ethernet  eth0

# nmcli con mod eth0 connection.autoconnect true ipv4.method manual ipv4.addresses 10.0.0.1/24
You can add other settings that you need, like
ipv4.gatewayandipv4.dns.- Make sure a file for your network connection has been created in
/etc/NetworkManager/system-connectionsand persist it to rootcopy. Run the pxe-server command. The first time you run it, it will generate an empty
/etc/pxe-server.conffile and complain that it is not configured:# pxe-server Configure /etc/pxe-server.conf properly
Edit that file, it contains the following environment variables that define how PXE clients configure their network:
# IP range and netmask for PXE clients
# e.g. 10.0.0.50,10.0.0.250
PXE_RANGE=
PXE_NETMASK=

# Gateway and DNS server. Optional, default to this host.
PXE_GATEWAY=
PXE_DNS=

# dnsmasq extra options
DNSMASQ_EXTRA=""
- PXE_RANGE: Defines the DHCP IP address range to use for PXE clients.
- PXE_NETMASK: Netmask of the DHCP range.
- PXE_GATEWAY: IP address of the network gateway. If it is not set, PXE clients will use this server also as gateway. In that case, you will have to configure it to route network traffic.
- PXE_DNS: IP address of the DNS server. If it is not set, PXE clients will use this server also as DNS server.
- DNSMASQ_EXTRA: Additional options to pass to dnsmasq (the DHCP and DNS server). This is useful if you want to provide the clients with additional information in the DHCP response (e.g. NTP server).
- Fill in the correct values for your network, and persist it to the rootcopy directory.
- Edit the file
/mnt/sda1/boot/syslinux.cfg(BIOS boot) or/mnt/sda1/EFI/BOOT/syslinux.cfg(UEFI boot) and append the 'pxe' kernel parameter to your default boot entry. This will start the pxe server on boot. Run the pxe-server command again to start the PXE server now. You should see an output like this:
Preparing PXE environment - wait a while...
storage= cheatcode not found or not valid,
clients wont be able to save the changes over network.
PXE services should be started now
Then the following directories and files should have been created:
/srv/pxe/boot. Contains the pxelinux files to boot the PXE clients, for both BIOS and UEFI./srv/pxe/porteus. It is bind-mounted to/mnt/sda2/porteus, so that the PXE clients can load the OS files. Besides, the directory/srv/pxe/porteus/rootcopy.pxeis created, where you can persist the configuration files for the PXE clients independently from the configuration of the server.
Your PXE server is now prepared to serve the flexVDI client. If it does not need a graphical interface, you can set the runlevel 3 as the default runlevel. Set the line id:4:initdefault: to id:3:initdefault: in the /etc/inittab file, and persist it to rootcopy.