...
In the authentication mode drop-down, select "AD/LDAP Authentication". Click Next.
In this screen are configured all the settings to access the directory service are configured. The input fields are:
- IP Server: IP address of the machine that serves the LDAP / Active Directory / ...
- Server port: 389 is the default value.
- Proxy User User name to be used to query the LDAP, called "bind DN" in some environments. You must enter the full full DN (domain name). In Active Directory servers it has the form "Domain Name"\"User Name".
- Proxy Password: password to authenticate the "proxy user".
- Realm: LDAP branch under which the information on the users of this flexVDI infrastructure is stored. In a common configuration of Active Directory, you must enter the Common Name "Users", followed by the components specified of the specific domain name as DC, separated by commas; for example "cn=Users,dc=companyname,DC=com"
- RDN entry: RDN component used in the search associated with the user name entered in the flexVDI Client. Normally, "cn" or "uid" which result in searches of the form "cn=JohnDoe" or "uid=JohnDoe".
- Desktop policy Attr: if we identify users connecting to flexVDI desktops, we are able to assign different "Terminal policies" to each of them. We can assign different Guests to each user, or to some of them. The Desktop Policy to be used for each user is stored in the directory server in the their corresponding user entry. The attribute of the scheme used to store it, is configurable using this field. To simplify user management, flexVDI recommends using an attribute such as "description" that is easily visible and editable by the common user directory data management tooltools.
In this attribute of the LDAP attribute we can record for every user:
- A Guest name. When the user connects to the system with a flexVDI Client he will access the console of this Guest.
- The name of a Desktop Policy; in our example: "freeAccessRoomDesktop". When the user logs in, flexVDI will be present him one of the machines created with the corresponding Desktop Policy.
- A list of comma separated Desktop Policy or Guest names. These desktops will be shown as a list of options for the user to connect. For instance, if we had created more desktops, it could the value of the entry in the LDAP would look like "xp,win7,debian8, freeAccessRoomDesktop"
- We can make the shown option name to be name shown to the user in the flexVDI Client not to match the name of the Guest / Policy in flexVDI Dashboard, using the syntax: name=description. For example: "xp=Windows XP,win7=Windows 7,debian8=Linux,freeAccessRoomDesktop=Kiosk desktop".
- Default desktop Policy: Desktop Policy assigned to users who do not have their own Desktop specified in their Directory Service entry. It also uses the comma separated list of values format.
Now click "Finish".
You have now set up your "Terminal Policy" with user authentication. Now you must assign to it the terminals from which authenticated users will connect, as shown in VDI: flexVDI in kiosk mode under the "Assigning a terminal to a terminal policy" header.
Accessing the desktop with flexVDI Client
Now we you will use the VDI environment you just created. To do this you will use the flexVDI Client Client that was installed and configured in the previous page VDI: flexVDI in kiosk mode.
Having assigned an authenticated Desktop Policy to the terminal, flexVDI Client will show a screen like this: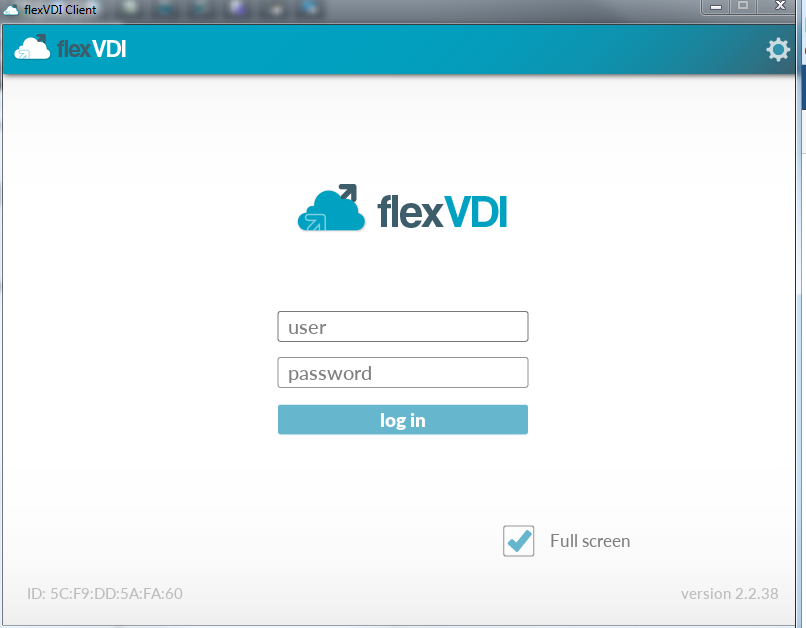
...
If you had created several Desktop Policies of Guests and would have associated them to the user, you he would be shown a desktop selection screen to choose the desktop you want to use now.
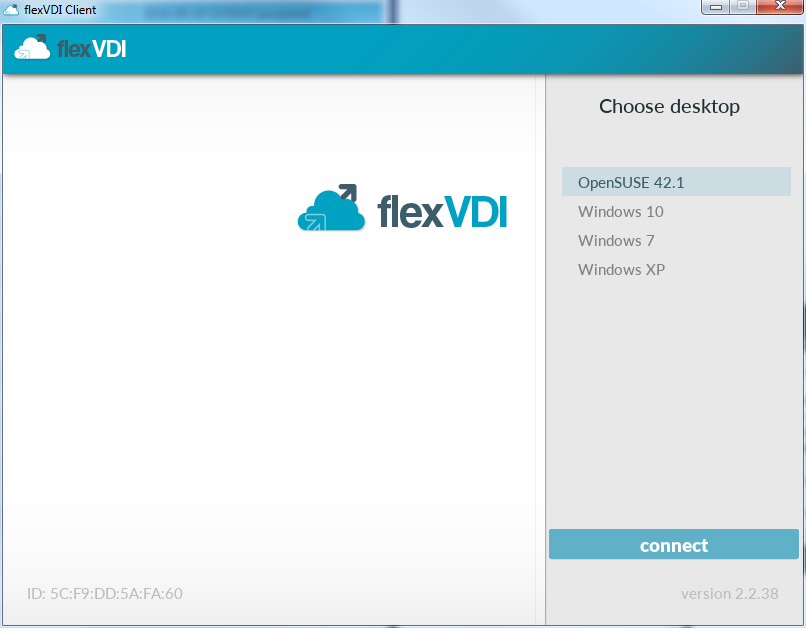
And after pressing "enter":
...
It will be connected to the console of your the selected desktop.