flexVDI Client for Windows
- FlexVDI
Analytics
Overview
flexVDI Client gives the user the experience of being sitting in front of his virtual desktop. Most of the time flexVDI will present the user the image of the screen of a computer. It looks like his:
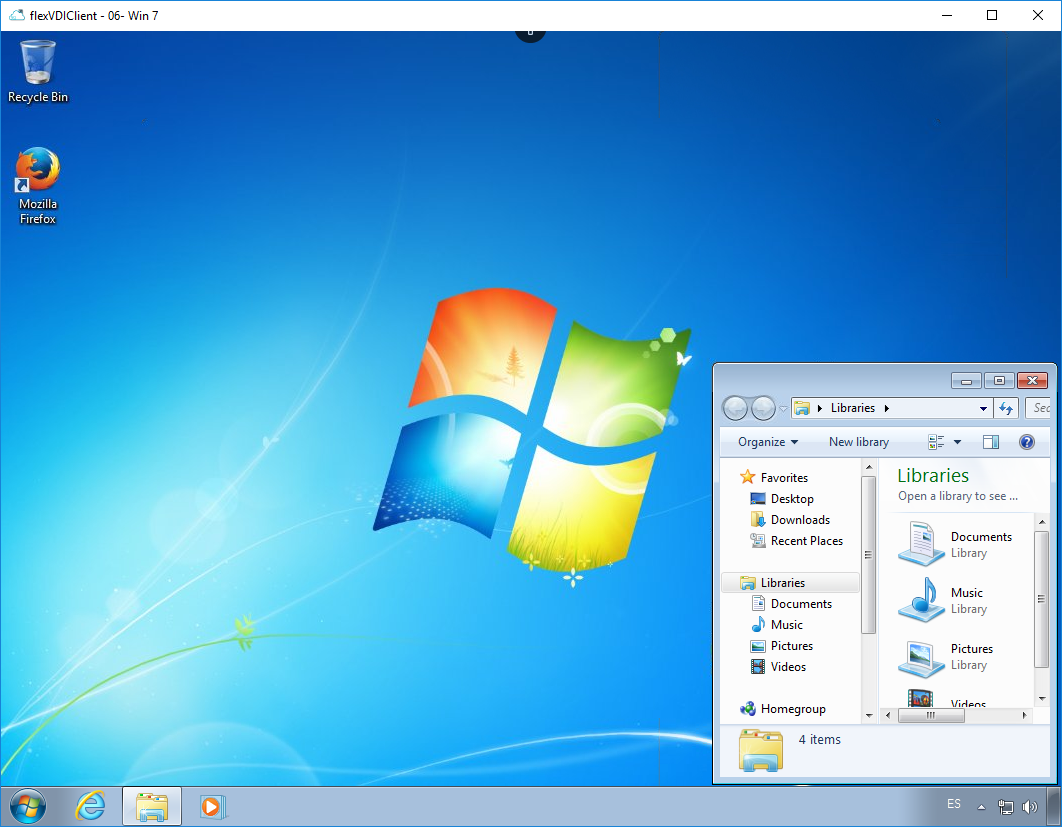
flexVDI Client shows the screen of the virtual desktop. When the user moves the mouse, or types on the keyboard, flexVDI Client will send these inputs to the virtual computer (Guest) just as if mouse and keyboard were directly connected to it.
Connecting to the desktop
Authenticated connection
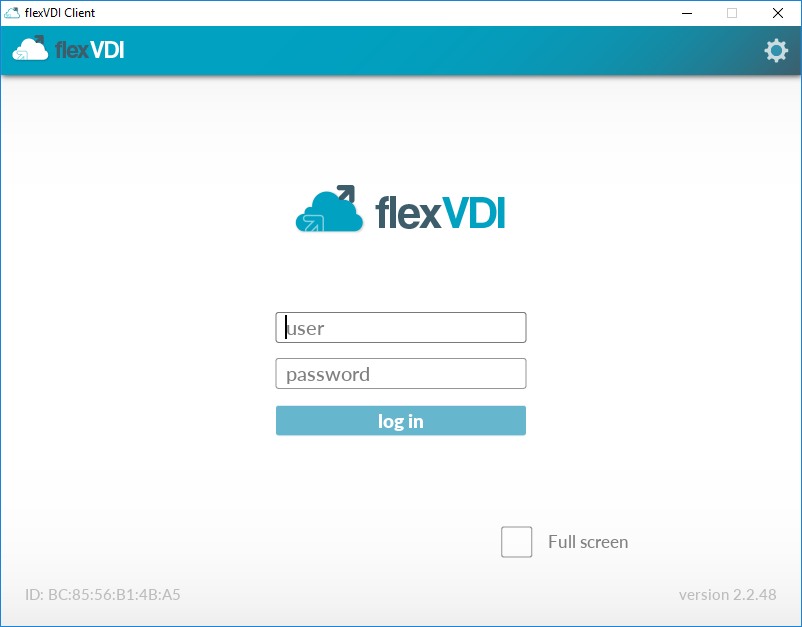
A common scenario of usage of flexVDI platform implies the authentication of the end-users before presenting them their desktop. If the flexVDI platform administrator has configured the service this way, when the user starts flexVDI Client, he will be presented a screen like the following. Enter your user name and password, and click on "log in".
Unauthenticated connection
It is also possible to access the virtual desktop without authenticating users. This is the case when flexVDI is used in "kiosk mode" to give access to public desktops in scenarios like libraries. In this case, the desktop is associated only to the physical computer running flexVDI Client, and the authentication step is skipped.
Desktop selection
If you have access to only one desktop, you will automatically be connected to it. Otherwise, you will be presented with a list of the virtual desktops you can connect to, so you can choose the one you want. It looks like this:
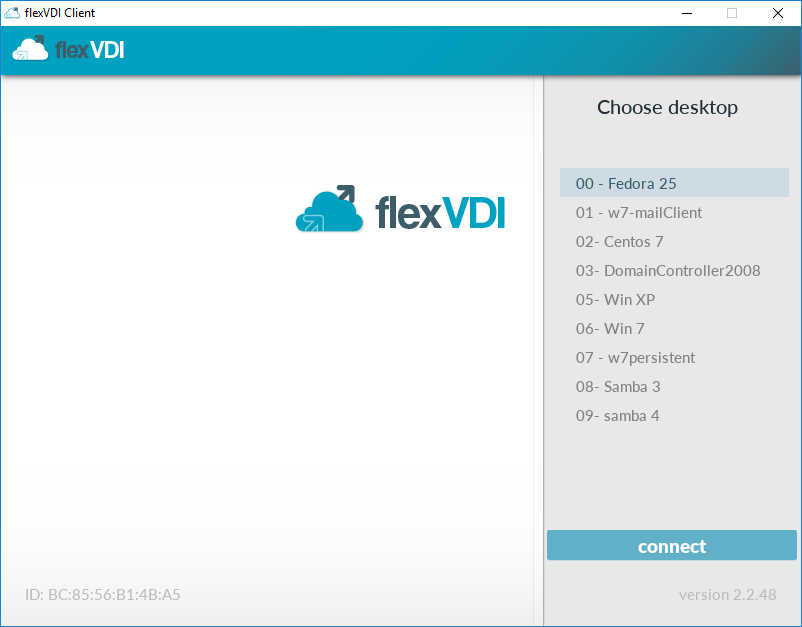
After choosing an option, you will be connected to the selected desktop and will be able to use it.
Configuration
You can enter the configuration screen clicking on the gear icon in the top right of the screen. Alternatively you can click on the "Config" item created in the Windows Start menu, in the "flexVDI Client" group.
You will be presented with a screen like this:
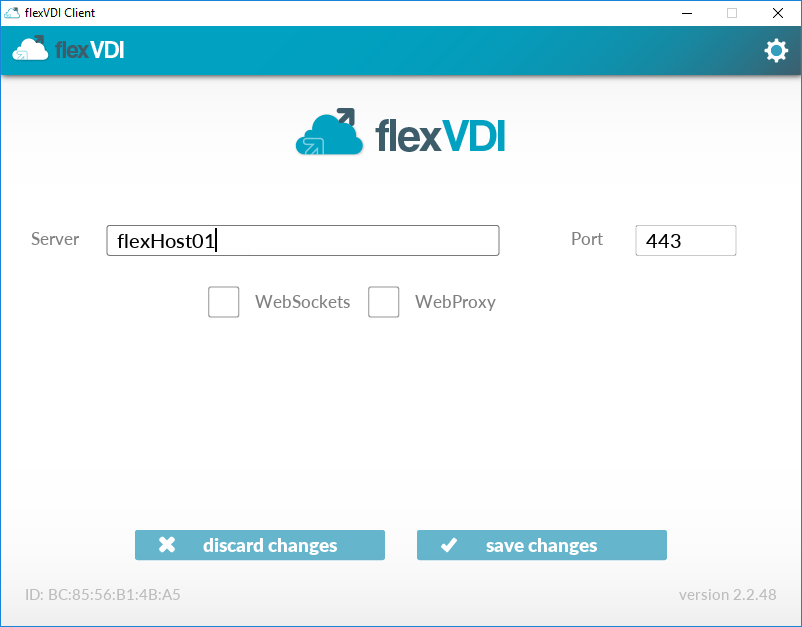
- Server and port: IP or name of the server that the flexVDI Client has to connect to. Ask your flexVDI platform administrator for the value to enter.
- Websocket: Field only needed when connecting to old servers. Recent versions negotiate the decision of using websockets with the server.
- Webproxy: check it if you need to use a webproxy to connect to the server. More fields will appear:
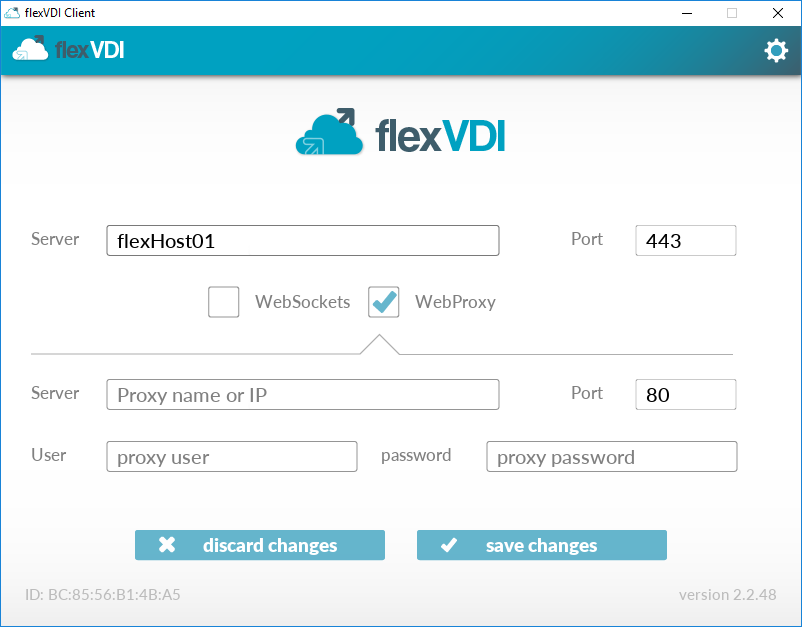
Enter the proxy server name, and IP. Optionally, you may have to enter a web proxy user name and password, depending on the web proxy configuration. If in doubt, consult your network administrator.
Configuration files
flexVDI Client for Windows stores its configuration data in a file. This file is created and managed by the installer and flexVDI Client, so usually there is no need to modify it with external tools.
When flexVDI Client for Windows is started, it tries to open the user config file. If it does not exist, then it tries to open a default config file, which is stored in a common path in the computer. flexVDI Client installer creates the default config file, so it always should exist. In the event that this file didn't exist, default empty values will be loaded.
Configuration file stores the required data to connect to the flexVDI manager (server IP address, port, ...) and also a list of the printers currently shared with the virtual desktop. It is automatically saved to disk when the program is closed. So the first time the user starts flexVDI Client, the default config file is loaded, and a user config file is generated iwth the values entered by the user, which will be loaded on start from then on.
Configuration file path
The config file for each user is stored in
%APPDATA%\flexVDI Client 2.2\config.xml
In Windows 7 and later, it usually corresponds to a path like "C:\Users\USER_NAME\AppData\Roaming\flexVDI Client 2.2\config.xml"
The default config file is stored in
%ALLUSERSPROFILE%\flexVDI Client 2.2\defaultConfig.xml
It usually translates to a PATH like "C:\ProgramData\flexVDI Client 2.2\defaultConfig.xml" in Windows 7 and later
Usage
You can open the flexVDI Client menu, clicking on the auto-hidding plus button in the center of the top border of flexVDI Client window.
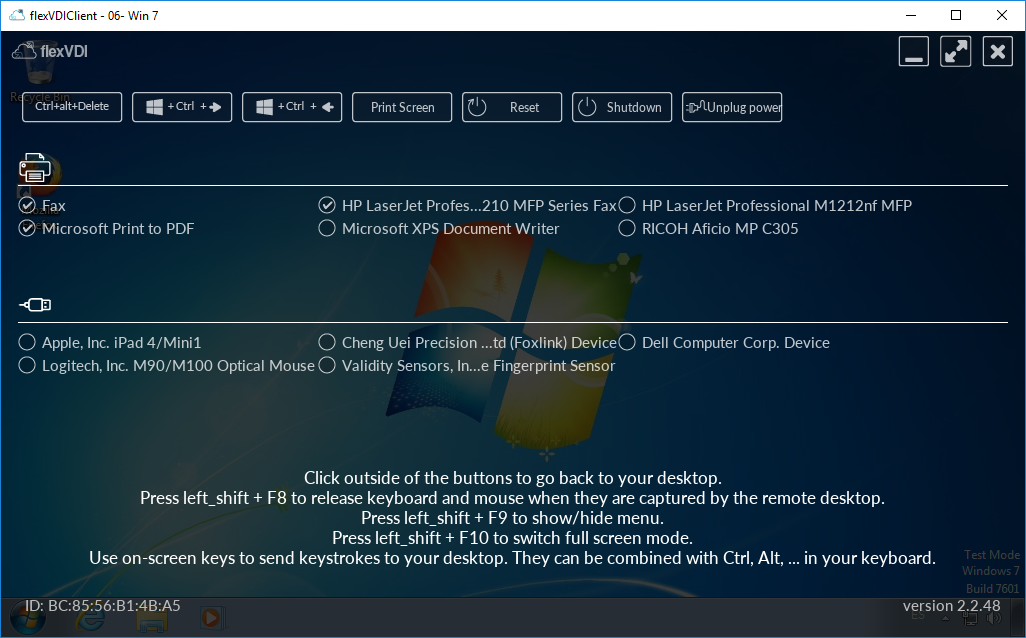
The three buttons in the top right corner let you toggle full-screen, minimize, or close the window, even on full screen mode, when there is no window bar with the equivalent buttons.
Keystrokes with effect on the virtual machine
When flexVDI Client for Windows is the focused application, most keystrokes are sent to the virtual desktop. Specifically, ALT, CTRL and Windows key are inhibited in the local machine so that the user has a better immersive experience in the virtual desktop. So ALT + TAB, ALT + F4, and other shortcuts make effect in the virtual machine, and do not make flexVDI Client to lose the focus in the local machine.
Keystrokes with effect on the local machine
Some keystroke combinations are not sent to the virtual desktop, but make effect in the local windows machine.
- Windows Secure Access Sequence (SAS): CTRL + ALT + Del. This sequence can not be inhibited by MS Windows design and is handled by the local Operating System.
- "Windows key + CTRL + left/right" and "Windows key + tab": This shortcuts are not inhibited and are executed on the local desktop. Since 2.2.19.
Sending special keystrokes to the virtual machine
You can send some keystrokes, like Windows Secure Attention Sequence Ctrl+Alt+Del to the Guest, from the menu. Instead of typing them, use the buttons in the top of the menu.
Shutting down the virtual machine
In the first line of the client there are three buttons that send power actions to the Guest:
- Reset: equivalent to pushing the "reset" button on a physical PC. The Guest will be abruptly shutdown and restarted.
- Shutdown: equivalent to pushing the "shutdown" button on a physical PC. It will orderly shutdown the machine in most situations.
- Unplug power: equivalent to removing the power plug in a physical PC. It will abruptly shutdown the Guest. The flexVDI system administrator can configure Guests to "Run always", so it may immediately restart. Using flexVDI Client to connect to a Guest will start it too.
Follow me printing
flexVDI Client lets you share your locally installed printers with your Guest. In the menu, you will see a list of locally installed printers. Click on one of them, and the printer will be connected to the Guest. It can take several seconds to the Guest to detect and install the drivers for the printer, specially on Guest running old operating systems.
For "Follow me printing" to work, flexVDI Client Guest tools must be installed in the Guest. They will additionally install a virtual printer called "flexVDI PDF Printer" in the Guest. Printing on it will generate a PDF on the local machine running the flexVDI Client.
flexVDI platform administrators can disable this feature.
Release mouse and keyboard on flexVDI Client for Windows
flexVDI Client comes with some handy shortcuts:
- Left shift + F8: free mouse and keyboard from Guest capture, and get them out of the flexVDI Client window.
- Left shift + F9: show menu.
- Left shift + F10: toggle full screen mode.
If flexVDI Guest tools have not been the installed in the Guest, or they are not running yet (for instance during the Guest boot process), mouse pointer is "grabbed" by the Guest, and the usage of the keyboard shortcuts is needed to release it.
These shortcuts are also shown when flexVDI Client menu is active.
Logs
Logs generated by flexVDI Client are stored in two files that can be found entering "%APPDATA%\flexVDI Client" (without the quotation marks) in the address bar of Windows Explorer.
The detail level of the generated logs is configurable using the "-v" parameter when running the program from the command line interface, of adding it in the "target" field in the shortcut.
- -v0: No log generated.
- -v1: (default value). Only errors and warnings are registered.
- -v2: Some aditional information is regestered.
- -v3: Highest level of application logging. Generates a lot of output.
- -v4: Highest level of application and libraries logging. Generates a lot of output.
The command for launching fleXVDI Client (in its default installation path) with the highest log level is:
"C:\Program Files (x86)\flexVDI Launcher 2.2\bin\flexVDI Client.exe" -v4
Automated installation
flexVDI Client for windows can be installed by an script. First read the license agreement, and then run the following command (with administrative privileges to avoid the UAC dialog):
c:\path_to_installer\flexVDI-Client-2.2.xx-Installer.exe /VERYSILENT /SUPPRESSMSGBOXES /NORESTART