OCFS2
- Javier Celaya (Unlicensed)
- Jorge Olmos (Unlicensed)
Configuring OCFS2
OCFS2 is the file system used by flexVDI to manage the shared storage used by two or more flexVDI Hosts. OCFS2 is a cluster file system developed by Oracle, that provides high availability and performance. It is also open-source. With OCFS2, flexVDI takes advantage of its cache-coherent parallel I/O option that provides higher performance, and uses the file system switching on error to improve availability.
OCFS2 groups Hosts together in storage clusters. In fact, it is not needed to put all the flexVDI Hosts in the same storage cluster. If you have many Hosts, you can create several (disjoint) storage clusters that match your storage architecture. In particular, at least one storage cluster is required to access shared storage devices (which will be later configured as OCFS2 Volume in an Image Storage) even though they are used in one flexVDI Host only.
Step 1: Install the OCFS2 packages
Since flexVDI 3.1, the OCFS2 packages are not a requirement anymore. Since there is a different kmod-ocfs2-flexvdi package for each kernel release, it is difficult to automatically pull them using RPM dependencies, and conflicts arise sometimes that may confuse users. So, the first option of the OCFS2 submenu in the flexVDI Config tool installs the OCFS2 packages, including the right version of the kmod-ocfs2-flexvdi package for the currently running kernel. Run it in every host.

Step 2: Creating a cluster with one node
Log into one of the Hosts and run flexvdi-config. In the OCSF2 submenu, select the Create entry. It will prepare an OCFS2 cluster configuration with the current node as its only member. From this point, you can start using OCFS2 Volumes in an Image Storage with this host.
Step 3: Join other nodes to the cluster
After you have configured the first node of an OCFS2 cluster, you have to make other nodes join the cluster. After registering the flexVDI Hosts with the Manager instance, follow these steps on each of them:
- Select OCFS2 in the main menu of
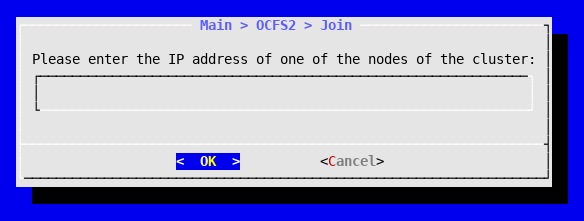
flexvdi-config. - Select the option Join
- It may ask you for the IP address and password of the Manager.
- Enter the IP address of the first node in the cluster and press OK. If the node has more than one IP address, use the IP known by the flexVDI platform.
Do this in every Host you want to be member of the storage cluster. As said before, you can also create new storage clusters, to match your storage architecture.
Removing a Host from the cluster
This operation is a bit trickier. The OCFS2 tools do not implement removing a node from a live storage cluster, so you must manually edit the cluster configuration and restart the OCFS2 services on each of the remaining Hosts.
Restarting the cluster services involves unmounting and remounting all your Volumes, which results in all the running Guests being killed when their Images disappear for a moment. So, safely stop all the Guests in a cluster before removing a Host.
On each host:
Edit the file
/etc/ocfs2/cluster.conf. It should look like this:node: ip_port = 7777 ip_address = 10.0.0.10 number = 0 name = flexnode01 cluster = ocfs2 node: ip_port = 7777 ip_address = 10.0.0.11 number = 1 name = flexnode02 cluster = ocfs2 cluster: node_count = 2 name = ocfs2
Delete the node entry of the host you are removing, adjust the node numbers of the following nodes and decrease the node count of the cluster. Be sure to write the same configuration in all nodes. For instance, if we removed node flexnode01 in the previous example, the resulting configuration file would be:
node:
	ip_port = 7777
	ip_address = 10.0.0.11
	number = 0
	name = flexnode02
	cluster = ocfs2

cluster:
	node_count = 1
	name = ocfs2
- Restart the cluster services with
systemctl restart o2cb
Resizing an OCFS2 volume
It is possible to resize an OCFS2 volume to make it bigger (never smaller), just follow these steps:
- Make a backup of the contents of the volume.
- You need to unmount the volume, so:
- Stop all the guests with an image in that volume.
Stop the flexvdi-agent service in all the hosts that share the volume. Otherwise, they will remount it as soon as they detect it is not mounted:
# systemctl stop flexvdi-agent
- Unmount the volume in all the hosts.
In one host, perform a filesystem check. Assuming it is in partition
/dev/sdb1:# fsck.ocfs2 -f /dev/sdb1
- Resize the underlying device to the desired capacity. This may be a logical volume in a shared storage cluster, for instance. How you do this is out of the scope of this guide.
Rescan the underlying device in all your hosts. Assuming the device is
/dev/sdb, run in all the hosts:# echo 1 > /sys/block/sdb/device/rescan
If your device is part of a multipath device, rescan all the devices (sdb, sdc, ...). Then, assuming it is called
mpatha, run in all the hosts:# multipathd resize map mpatha
Resize the underlying device partition. Assuming the device is
/dev/sdb, run in one host only:# parted /dev/sdb resizepart 1 100%
Note: The
resizepartcommand needs theparted-3.1-29.el7package, install it if needed.Now, refresh the partition sizes in all your hosts. Specify all the devices that must be probed if you have multipath. Do not just run "partprobe" as there can be problems with multipath devices being busy.
# partprobe /dev/sdb [/dev/sdc... /dev/mapper/mpatha]
Resize the OCFS2 filesystem in one host only and check it again:
# tunefs.ocfs2 -S /dev/sdb1
# fsck.ocfs2 -f /dev/sdb1
- Finally, restart the flexvdi-agent service again in all your hosts, and they will mount the volume again in the right place.
More info: