Basic host configuration
Once flexVDI 3.0 is installed, you need to apply a basic configuration to your first host, and create a flexVDI Manager instance to get all your physical resources under control. This operation is done with flexvdi-config, a text based tool which allows you to easily accomplish these tasks.
Before you begin: Open network ports
The flexVDI Software Suite consists of several distributed components that communicate through TCP/IP connections. This means you need to make sure your firewall rules allow this communication. However, CentOS 7.4 and RHEL 7.4 come with firewall rules that disallow incoming connections to most TCP ports by default, governed by the firewalld system service. The flexVDI Config tool cannot reliably check that the required network ports are open, so you have to check it by yourself. Alternatively, a common alternative is to completely disable the firewalld service and rely on network-wide filtering. The network ports used by different components of the flexVDI Software Suits are the following:
- TCP 22: SSH is used to migrate virtual machines.
- TCP 443: the flexVDI Gateway installed in each host uses this port to accept connections from clients. This port is configurable in
/etc/flexvdi/flexvdi-gateway.conf. - TCP 7777: the OCFS2 tools and daemons use this port to communicate.
- TCP 9443: the flexVDI Agent uses this port to receive requests from the flexVDI Manager.
- TCP 5800: the flexVDI Manager VM uses this port to accept Spice connections.
- TCP 5900 and up (5900 to 15900 by default): Ports used for Spice connections to other VMs.
Of this list, only port TCP 443 must be reachable by flexVDI Clients. Ports 5900 and up have to be reachable by flexVDI Dashboard to show guest consoles to the system administrator. The rest can be made reachable only by other hosts of the platform and the Manager.
Main menu
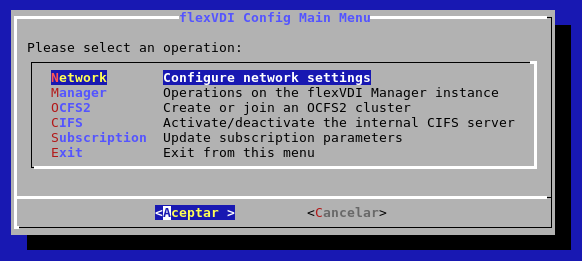
flexVDI Config main menu shows the following options:
- Network: TCP/IP configuration, creation of virtual bridges, vLANs and bonding.
- Manager: Installation and configuration of flexVDI Manager.
- OCFS2: Configuration of storage clusters.
- CIFS: Installation of a CIFS server on this flexVDI host to be used as ISO storage for the Guests Media Storage.
- Subscription: register the flexVDI Host in flexVDI portal to enable downloading software updates and flexVDI Manager.
Network configuration
The first submenu of the flexVDI Config tool will help you configure the network settings. Note that it does not do anything that could not be done with the regular Linux tools. It just helps you configure the network in the way flexVDI expects it so that virtual machines can be connected among them and with other computers. flexVDI Config will write these settings to the ifcfg-xxx scripts in /etc/sysconfig/network-scripts so that they are applied on every boot.
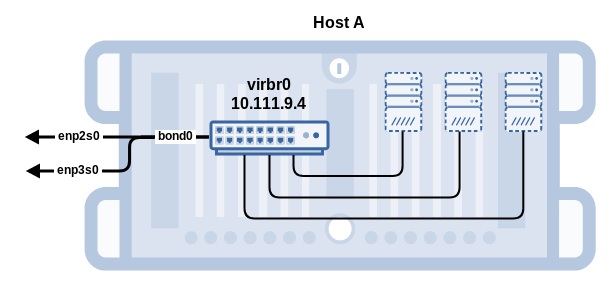
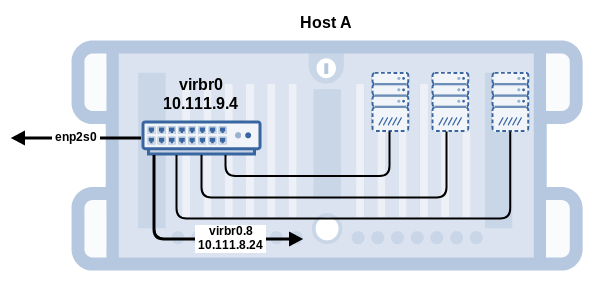
flexVDI organizes guests in subnets with the help of virtual bridges. A virtual bridge communicates virtual machines among them, as if they were in the same network segment. Also, they can communicate with the outside if one of the host's physical interfaces is also attached to that virtual bridge. With the flexvdi-config tool, you can manage virtual bridges, setup bonds and local VLAN interfaces, and configure the TCP/IP information of them all. In this first basic configuration we are going to create a single virtual bridge (vibr0) with two physical interface attached to it (enp2s0 and enp3s0) through a bonding interface (bond0), and configure an IP address:
Physical interface bonding
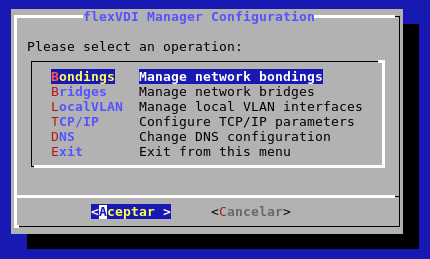
When you select Network in the main menu, you will be presented with the following options:
The first options lets you set up bonds among several physical interfaces. This feature enables the use of multiple network cards as if there was just one. flexVDI Config allows you to configure two different bonding modes:
- Active-backup: Only one slave card is active. If the active card fails, another one becomes active and accepts network traffic. This option allows failure tolerance.
- 802.3ad: This option allows interface aggregation in order to increase the bandwidth. All interfaces must be configured with the same speed and bandwidth, and the network equipment (switches...) must support 802.3ad, also known as port Trunking or LACP (in Cisco).
Create a bonding interface only if you have more than one physical interfaces that want to cooperate in one of these two ways. To create a bonding with two network interfaces, follow these steps in flexVDI Config:
- Choose Network in the main menu.
- Choose Bondings.
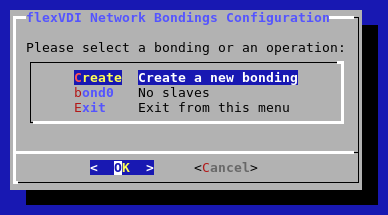
- Choose Create.
- Choose the bonding mode that you wish to configure, Active-backup or 802.3ad.
A new network interface named bondN will be created, where N is the bonding number starting at 0.Now you have to attach slave devices to this interface:
- Select bond0 in the Bondings menu.
- Use option Attach to add physical interfaces to the bonding. In our example, you would add enp2s0 and enp3s0.
From this menu, you can also remove physical interfaces from the bonding with the Dettach option, or delete it completely with the Delete option.
Virtual machine bridging
flexVDI attaches virtual machines to bridges so that they can communicate. Follow these steps in order to create a bridge:
- Select Network in the main menu.
- Select Bridges.
- Select Create.
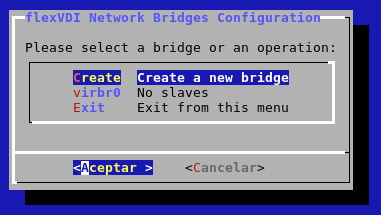
You will be informed that a new network bridge named virbr0 has been created. Upon returning to the screen of network bridges, you will see you have a new bridge with that name, without any assigned slave. An isolated network bridge like that can be useful to define a subnet of virtual machines without direct access to the outside.
In order to attach a physical interface to the virtual bridge, just follow these steps:
- Select virbr0.
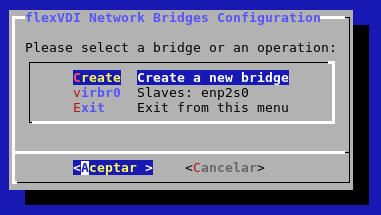
- Select Attach. A list of free network interfaces in that Host will be displayed. Select the one you want to use in order to provide network access to virtual machines (see how network interfaces are named). In our example you would use bond0, but in a simpler scenario you could just select a physical interface like enp2s0:
Like with bondings, you can also remove network interfaces from the bridge with the Dettach option, or delete it completely with the Delete option.
Local VLAN management
In a complex network configuration, it may be interesting to separate network traffic in different VLANs. The LocalVLAN option lets you define interfaces that let the host access a VLAN on a virtual bridge. This step only provides VLAN access to the host, and does not provide VLAN access to the flexVDI Manager or other virtual machines, which will have to be configured separately. More on how to configure VLAN access for virtual machines in the First Steps with the Dashboard guide. Here, we are going to show how to provide the host with access to VLAN 8:
To create a local VLAN interface on virbr0, follow these steps:
- Select Network in the main menu.
- Select LocalVLAN.
- Select Create.
- Select virbr0.
- Enter the ID of the VLAN. In our example, 8.
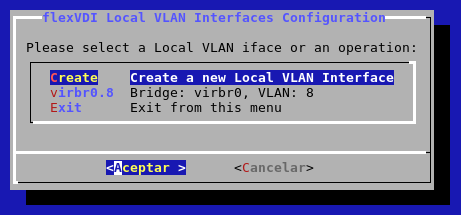
A new network interface is created with the name virbr0.id, where id is the VLAN identifier; in our example, virbr0.8. Thus, through this interface the host is now able to access the VLAN on that virtual bridge.
TCP/IP Configuration
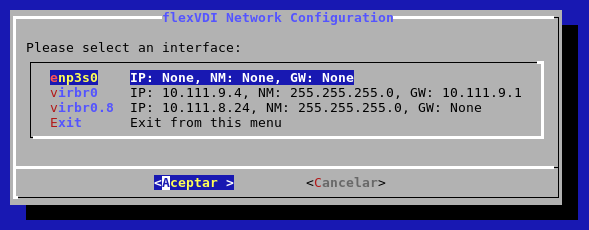
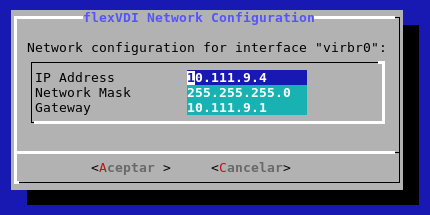
The TCP/IP submenu lets you define the IP network parameters associated with each interface. We will configure the network bridge virbr0 so that the host can access the Internet through it. This will allow us to update the host and download the flexVDI Manager image later. If you created a local VLAN interface in the previous step, configure that interface instead.
- Select Network in the main menu.
- Select TCP/IP.
- You will see a list of all available network interfaces on the host. Interfaces that are slaved to a bonding or a bridge do not show here:
- Select virbr0 and assign the appropriate parameters to access your corporate network. For example:
DNS Configuration
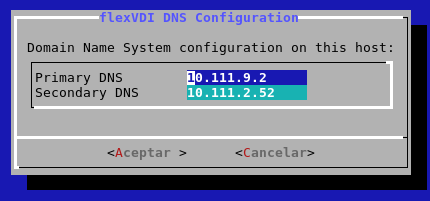
Finally, the DNS option of the Network menu allows you to configure DNS servers for host name resolution. Simply enter the DNS option, and configure the address of the name servers you want to use.
Applying network configuration changes
Once you have finished the previous steps, the network settings of your first flexVDI Host have been defined. To apply this configuration, you must leave the Network menu. Then flexVDI Config will notify you that the network settings have changed and it is required to restart the network service for the changes to take effect. Confirm that you want to perform the operation.
